

Does Your Phone Mount Fit Your Dashboard in 2026?
Last Updated: November 8, 2026
Quick Summary
To check whether a phone mount dashboard setup will fit, measure the flat area where the base will sit, compare it to the mount's listed base size, and confirm the spot does not block your view or airbags. Then test the surface curvature and material before buying.
- Measure the flat base area in inches and compare it to the mount's listed base size
- A gap under 1/16 inch across a 3-inch span means the surface is effectively flat
- Keep at least 2 inches of clearance to the windshield glass
- Never place a mount over or beside a passenger airbag seam
- Make a cardstock template and press it onto the spot before buying
Table of Contents
- What a Dashboard Fit Check Actually Tests
- How to Measure a Dashboard for a Phone Mount
- Checking Dashboard Shape, Curvature and Surface Material
- Phone Mount for Textured Dashboard: Will the Base Hold?
- Best Place to Mount a Phone in a Car Without Blocking Your View
- How to Keep a Phone Mount From Falling Off
- Running an At-Home Fit Test Before You Commit
- Frequently Asked Questions
What a Dashboard Fit Check Actually Tests
Before you buy a phone mount, you want to know one thing: will it stay put on your dashboard? A phone mount dashboard fit check answers that question. It looks at the shape of your dashboard, the surface material, and whether the mount's base can grip it without slipping.
A common mistake is picking a mount based on how it looks in a product photo, then finding out it wobbles on a curved dashboard. A quick check first saves time and frustration.
A fit check tests three things. First, whether the base sits flat or can form a full seal. Second, whether the surface is smooth, textured, or soft enough to hold adhesive or suction. Third, whether the mount sits where you can see the road and reach the phone without stretching.
Consumer Reports has evaluated 15 cell-phone mounts, including models that attach to air vents and the windshield, which shows how many different mounting styles are on the market (Consumer Reports guide to choosing a cell-phone mount). Each style has its own fit rules, so start by knowing which one you are considering.
- Dashboard mounts need a flat or gently curved surface
- Vent mounts depend on the slats and their width
- Windshield mounts depend on glass clearance and suction
- Cup-holder mounts depend on the holder's diameter
How to Measure a Dashboard for a Phone Mount
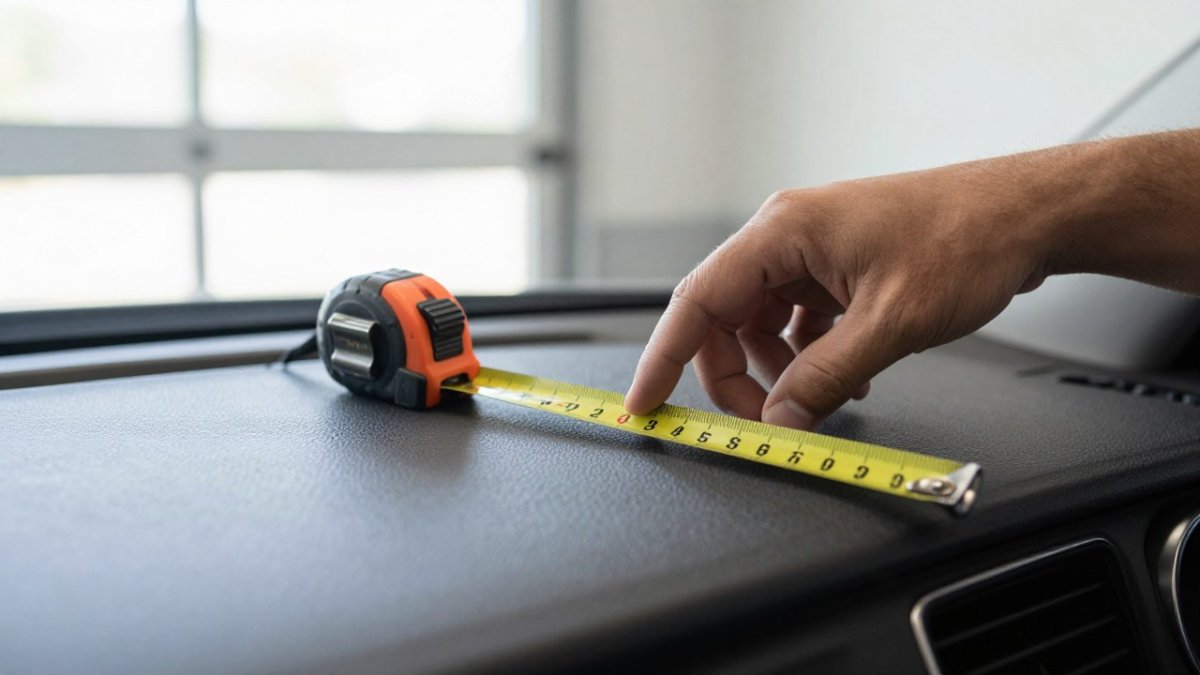
Measuring is the simplest way to check fit for a phone mount dashboard setup. Grab a tape measure and a notepad before you shop.
Start with the open flat area where the base will sit. Measure its width and depth, then note any vents, buttons, or sensors nearby. Next, measure the distance from that spot to the windshield and to the steering wheel. This tells you whether the mount will block your view or your controls.
Compare these numbers to the mount's listed base size. Look for the product's dimensions in inches or millimeters, not just the phrase "universal fit." A mount with a 3-inch base will not work on a dashboard area that is only 2 inches wide.
- Measure the flat base area in inches
- Note nearby vents, buttons, and airbags
- Check clearance to the windshield
- Compare all numbers to the listed base size
Measuring the spot and comparing it to the mount's listed base size takes only a few checks.
| Check | What to measure | Pass condition |
|---|---|---|
| Flat base area | Width and depth in inches | Larger than the mount's listed base size |
| Nearby obstacles | Vents, buttons, airbags | Base does not cover them |
| Windshield clearance | Distance from spot to windshield | Mount will not block your view |
| Product dimensions | Listed size in inches or mm | Specified, not just "universal fit" |
Checking Dashboard Shape, Curvature and Surface Material
Shape and material decide whether a mount can form a full contact patch. Treat them as two separate tests, because a dashboard can pass one and fail the other.
Curvature test. Lay a straightedge, a ruler, a level, or the edge of a hardcover book, across the spot where the base will sit. Look for daylight under the middle or the ends:
- Gap under 1/16 inch across a 3-inch span: effectively flat, and most suction and adhesive bases will seat.
- Gap of 1/16 to 1/8 inch: gentle crown or dish. A flexible or gel base can conform; a rigid plastic base will rock.
- Gap over 1/8 inch, or a compound curve that bends in two directions at once: suction cups will lift at the edges and adhesive pads will bridge instead of bond. Plan on a different location or a different mount style.
Repeat the straightedge check front-to-back as well as side-to-side. A dashboard that looks flat left-to-right is often crowned toward the windshield, which is exactly where mounts tend to peel first.
Material test. Wipe the spot with a clean, dry microfiber cloth and look at how light reflects. Then match the finish to the attachment method:
- Smooth hard plastic (painted or molded, no grain): the easiest surface. Suction cups hold well when clean, and most adhesives bond reliably.
- Grained or textured plastic: the grain reduces contact area. Suction needs a smooth adapter disc or a gel pad; adhesive needs a high-conformability foam tape rather than a thin film.
- Soft-touch, rubberized, or coated finishes: these often contain plasticizers and release agents that migrate to the surface and defeat adhesive over weeks. Suction performs poorly because the surface yields under vacuum. Expect to use a semi-permanent adhesive pad or move to a vent or cup-holder mount.
- Leather, leatherette, and vinyl: conditioners and cleaners leave a film that blocks bonding. Adhesive can also pull the finish when removed. Test in an inconspicuous spot first.
- Wood trim, piano black, and clear-coated decor panels: adhesive removal can mar the clear coat. Prefer suction with a protective disc or avoid these panels entirely.
Temperature and sun exposure. A dashboard in direct summer sun can reach temperatures well above ambient, and both suction and pressure-sensitive adhesive weaken as the surface softens. Note whether your candidate spot sits in direct sun through the windshield for hours; if it does, favor a mechanical mount (vent clip, cup-holder, or a bolted bracket) over a purely adhesive one.
Watch out: a spot that feels flat and smooth when the cabin is cool can behave very differently after an afternoon in the sun, so judge curvature and material on a warm day if you can.
Once you know your curvature number and your finish type, you can rule out entire mount categories before you read a single product page.
Phone Mount for Textured Dashboard: Will the Base Hold?
A textured dashboard is harder for most mounts. Ridges and grain prevent a full seal, so suction and adhesive pads have less contact to grab.
A reader asking how a phone mount for textured dashboard will hold should look for a mount with a larger, flexible base or a gel pad that conforms to small bumps. Adhesive mounts often work better on textured surfaces than suction, but they are harder to remove later.
Keep the surface clean before you test. Dust, oil, and pet hair weaken grip.
Best Place to Mount a Phone in a Car Without Blocking Your View
Placement decides whether the mount is safe and useful. The best spot keeps the phone in easy reach while leaving your view of the road clear.
Most drivers do well with a spot low on the dashboard, slightly off-center, and below the windshield line. Avoid areas that block airbags or put the phone in front of gauges. Check local rules too, since some areas limit where objects can sit on the windshield.
A wireless charging dock can work well in this spot if the base fits.
How to Keep a Phone Mount From Falling Off
Falling mounts usually come from a poor surface prep or a mismatched base. Clean the dashboard with rubbing alcohol, let it dry fully, and press the base down firmly for 30 seconds.
Watch for heat. Dashboards in direct sun can soften adhesive and loosen suction over time. A common mistake is mounting in a sunny spot, then wondering why the mount slipped after a hot afternoon.
- Clean the surface with rubbing alcohol and let it dry
- Press the base firmly for about 30 seconds
- Wait 24 hours before adding a heavy phone
- Recheck the grip after the first hot week
Running an At-Home Fit Test Before You Commit
This is the step most buyers skip, and it is the one that prevents returns. You can verify footprint, viewing angle, reach, and clearance with a paper template and a temporary placement, no mount required. Work through the checks in order.
Step 1: Build a footprint template. Cut a piece of cardstock to the exact base dimensions listed on the product page, for example, a 3-inch-diameter suction base or a 2-by-4-inch adhesive plate.
Step 2: Test the footprint on the dashboard. Place the template on your candidate spot and press the edges. It should sit with no more than a 1/16-inch gap under any edge (see the straightedge test above).
Step 3: Check clearance in all directions. With the template in place, confirm:
- At least 2 inches of clearance to the windshield glass so the mount body and phone do not contact the glass.
- No overlap with airbag deployment zones. Passenger-side dash airbags deploy upward and outward through a seam; never place a mount over or immediately beside that seam. Check your owner's manual for airbag locations.
- No blockage of defroster vents, sunload sensors, or the light sensor that drives automatic headlights and climate control.
- No interference with wiper travel or the cowl if the spot is near the base of the windshield.
Step 4: Check reach and viewing angle with a stand-in phone. Tape a phone-sized rectangle of cardstock, match your phone's height and width, or use an old phone, to the template at the angle the mount would hold it. Sit in the driver's seat in your normal position and confirm:
- You can see the screen without moving your head more than a glance.
- The phone does not sit in your line of sight to the road, mirrors, or gauges.
- You can reach and tap the screen with your seatbelt on and your back against the seat.
- The phone does not block the center stack controls, hazard button, or passenger airbag indicator.
Step 5: Run a stability check. Give the template a firm sideways push and a downward press, simulating a hard brake and a pothole. If the template rocks, lifts, or slides, the real mount will do the same. Repeat in two or three candidate spots and rank them by how little they move.
Step 6: Confirm vehicle-specific fit. Before ordering, verify compatibility by make, model, year, and trim, because dashboard layouts change between trims and even mid-year. Check the manufacturer's vehicle fitment list, and if your trim is not listed, measure your own dashboard rather than assuming the base model's layout applies.
Step 7: Plan the removal. If you are leaning toward adhesive, decide now how you will remove it. Adhesive pads can lift paint, clear coat, or soft-touch finish if pulled cold.
Watch out: a template that passes every check can still fail if the surface is dusty or oily, so clean and dry the spot before your final test and again before installation. The essential car cleaning supplies guide lists what to use for prepping the surface.
A fit test costs nothing, takes about fifteen minutes, and rules out the most common reason mounts get returned: a base that never had a chance on your dashboard.
Frequently Asked Questions
How do I know if a phone mount will fit my dashboard?
Start by measuring the flat or gently curved area where the base will sit, then compare that space to the mount's base diameter or footprint listed on the product page. Check that the surface is smooth enough for the adhesive or suction cup to grip, and that the mount will not sit over an air vent, airbag cover or sensor. If the listing does not give dimensions, contact the seller before buying.
Will a suction-cup phone mount stick to a textured dashboard?
Often not reliably. Suction cups need a smooth, nonporous surface to form a seal, and heavily grained or soft-touch dashboards can prevent that. Test the spot first by cleaning it with rubbing alcohol, pressing the cup firmly and waiting several hours before attaching a phone. If it loosens, consider a vent, cup-holder or windshield mount, or a mount with a strong adhesive pad designed for textured plastic.
Can a phone mount attach to a curved dashboard?
Many can, but a curved dashboard is one of the most common reasons a mount fails. A flat or slightly curved base with a flexible ball joint usually adapts better than a rigid, deep-cup design. Check whether the base surface can meet the dashboard across its full contact area, and avoid placing the mount where it would press against a curve that reduces contact.
